Rainstorms can turn a cozy home into a drip-filled mess when water sneaks in around chimneys or vent pipes. Flashing sits between your roofing material and those roof penetrations to guide water away, yet it often goes unnoticed until a leak appears.
Why Flashing Matters More Than You Think
All your roof’s components work together to keep water out, but chimneys and vents interrupt the roofing surface. Flashing creates a watertight bridge between the roof deck and those interruptions. When flashing sits correctly under shingles or roofing material, it splits the flow, directing moisture down and away. If flashing gets bent, rusted, or installed too shallow, water finds its way beneath shingles and into the sheathing.
Early signs often include water stains on ceilings directly below those penetrations. Since those spots sit above key roof plumbing and vent lines, leaks can damage insulation, wiring, and even support rafters. Proper flashing installation prevents these hidden failures. A well-flashed roof turns potential disaster points into reliable drainage channels that operate quietly and effectively every time it rains.
Types of Flashing and When to Use Them
Flashing comes in several styles: step, saddle (or cricket), and continuous strip, to handle different roof features. Step flashing consists of small L-shaped pieces interlaced with shingles along a chimney’s side, each one overlapping like roof shingles to repel water at every layer. Saddle flashing sits behind a chimney peak to split water around its back, preventing pooling on the uphill side. Continuous strip flashing fits snugly around simple pipe penetrations, wrapping the pipe’s base and sealing it.
Choosing the right type depends on roof pitch, penetration size, and even wind patterns in your area. Looking for a one-size-fits-all solution leads to shortcuts, and shortcuts lead to leaks. Flashing styles differ in installation complexity and reliability. Learning which method fits your particular chimney or vent saves you time and money in repairs down the road.
Signs Your Flashing Needs Attention
You don’t have to climb onto the roof every time it rains, but a quick attic check can reveal trouble. Brown water stains directly under a chimney or vent tell you flashing may be failing. Loose or curled shingles along the penetration edges indicate that the waterproof layers underneath aren’t gripping correctly. On the roof, you might see cracked or rusted metal around those points, gaps where sunlight peeks through, or brittle sealant that has separated from both the roof and the protrusion.
Sometimes, you’ll spot granules from asphalt shingles collecting at the flashing base, evidence that shingles have slipped. Even a small gap, smaller than a dime, can let persistent drips form large leaks. Early detection gives you a chance to have a roofer reseal seams or replace a flashing section before water soaks into wood and insulation.
Materials That Stand Up to the Elements
Flashings come in galvanized steel, aluminum, copper, and lead-coated copper. Each metal has its distinct characteristics. Galvanized steel is rust-resistant and affordable but can corrode near salt air. Aluminum is a lightweight option that resists corrosion but can warp under thermal expansion on steep pitches. Copper, while pricier, forms a natural patina for protection and bends easily for tight seams around complex shapes. Finally, lead-coated copper combines malleability with durability for historic or architecturally intricate chimneys.
Choosing the right metal means matching your climate and roof architecture. In high-wind or heavy-snow areas, thicker gauge metal holds its shape better under a load. Proper gauge and metal selection give flashing a lifespan that outlasts the shingles around it.
Step-by-Step Flashing Inspection and Repair
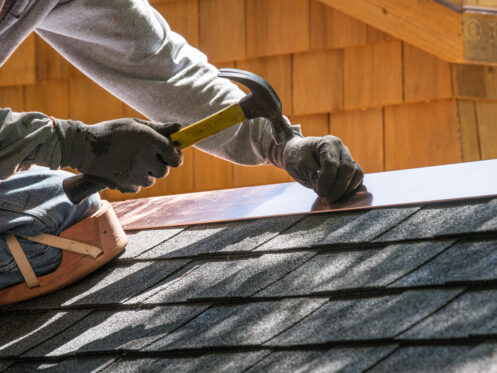
A hands-on inspection starts with clearing debris from the chimney base and vent area. Once the surface is clear, a roofing expert inspects each flashing seam where metal meets the roof or chimney. They tighten any nails or screws, replacing rusted fasteners with stainless-steel equivalents to avoid future staining. Carefully lifting adjacent shingles, they check that step flashing pieces remain interlaced correctly.
For leaking crickets, professionals remove shingle layers above the saddle flashing, reseat the metal into bedded mortar, and recut new shingles to fit snugly. Pipe vents with cracked roof boots call for complete boot replacement: cutting away old flashing, sliding on a new waterproof boot, and sealing its upper edge under the shingles. The last step of the task is running a thin bead of roofing sealant along every seam.
Integrating Flashing With Roof Replacement
When you replace your roof, flashing becomes even more critical. Old flashing should never sit under new shingles; overlapping metals can galvanically accelerate corrosion. Removing the old metal and installing fresh flashing ensures water sheds properly alongside the new roofing layers. For large chimney stacks, it’s worth installing a chimney pan at the roof deck level to collect any seepage and direct it to the step flashing below.
Flashing details also change if you upgrade your roofing material; metal roofs require continuous flashing pans rather than individual step pieces. Coordinating flashing and shingle replacement in one job eliminates redundant labor and materials. When your roofing crew removes the deck to replace rotten boards, they should also inspect and reinforce nailers for the new flashing.
Seasonal Checks to Extend Flashing Life
Flashings face constant expansion and contraction as temperatures swing from freezing nights to hot afternoons. That movement eventually loosens fasteners or cracks the sealant. A twice-yearly check, once in spring and again in fall, helps you spot small issues before they turn into leaks. Regular maintenance saves you from costly interior repairs later.
Your roofer will inspect for loose nails, small gaps at flashing overlaps, or weather-hardened sealant beads. Even if everything looks intact, they will gently press around each metal overlap to see whether the layers slide or separate. They will tighten or reseal where movement occurs. They might also trim overhanging tree limbs to keep leaves and branches off the flashing, preventing blocked drainage and scratches that can cut through sealants.
When to Call a Roofing Specialist
Complex chimney rebuilds, crickets on multi-flue chimneys, or flashing integration with solar panel mounts require specialized flashing skills. A trained roofer evaluates roof pitch, wind exposure, and local code requirements, ensuring every seam and fastener meets manufacturer standards. They also apply the correct underlayment, like ice-and-water shield, before flashing installation for extra leak resistance.
You may believe you can handle minor flashing repairs on a clear, calm day, but it’s always best to leave even these simpler tasks to a pro. Professional flashing work carries warranties that cover workmanship, an extra layer of protection for your home.
Schedule Your Roof Flashing Check Today
Flashing does more than fill gaps; it channels water off your roof and away from vulnerable spots. Regular inspections, quality materials, and precise installation keep those seals tight and your attic dry. You don’t need to become a roofing pro — you just need to know what to look for and when to call a professional for help. At The Roof Detective, we also provide gutter cleaning and shingle repair to round out your roof care.
Protect your home from leaks before the next hard rain hits. Schedule your flashing check with The Roof Detective in Columbus, OH, today and rest easy under a watertight roof.